Tutorial for VRay 3.4 is through here!
If you’re tired of altering those ready made materials to suit what you have in mind, this is the post for you!
It’s a pretty simple procedure that requires intermediate skills in image editing, SketchUp, and Vray.
For starters, you can use the images I used in this tutorial to practice as we go through this step by step. Just right click and save them.
You will need
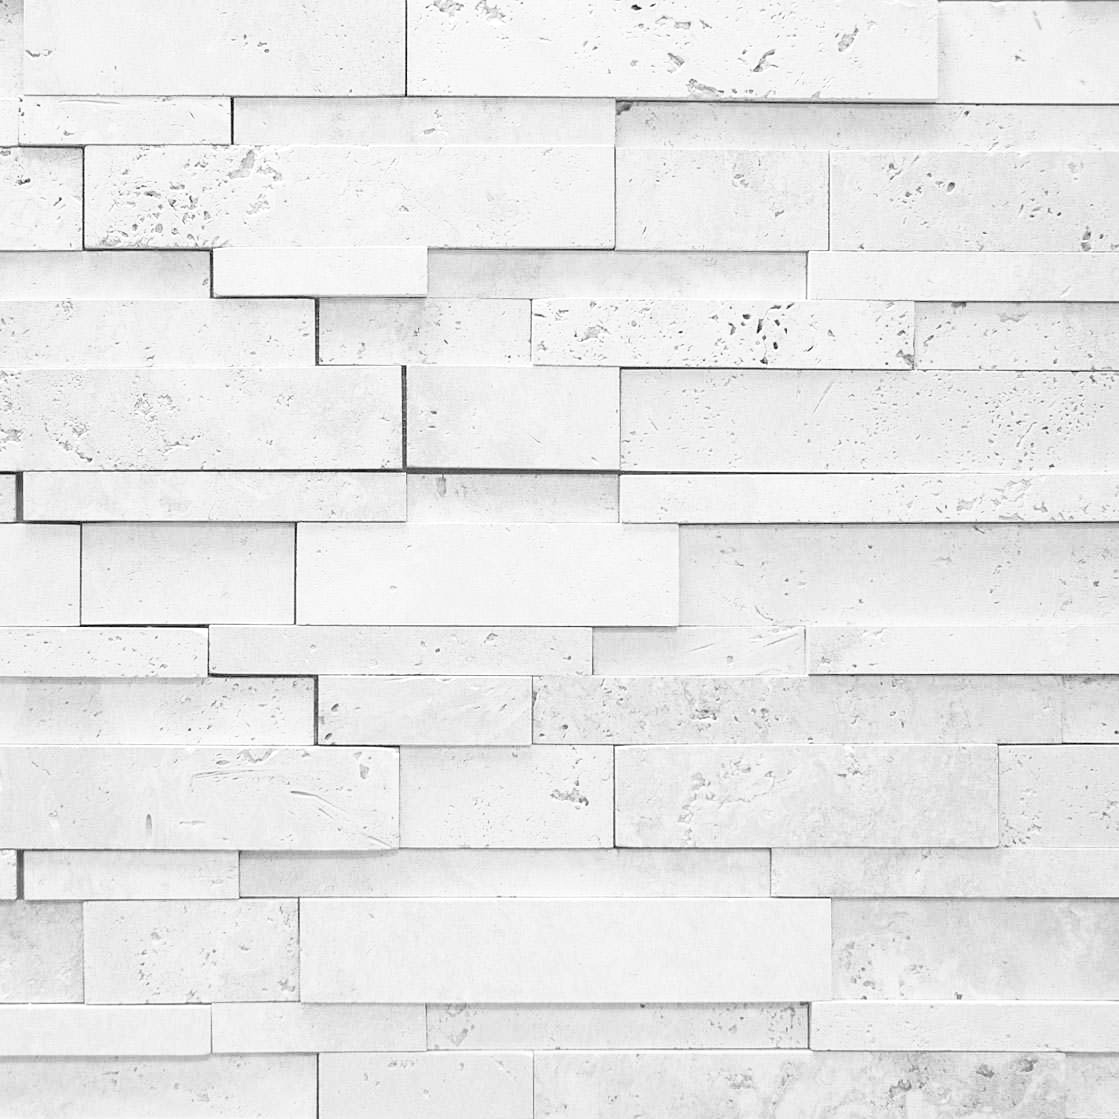
– Tile-able or Seamless texture images of your required material (You can either search them on Google Images or Devian Art).
– Photoshop or any other image editing program (Nothing Complicated).
In this tutorial I’m using
Sketchup 2014
Vray 2.4
ACDSee Pro 7.0
Here is what you have to do
- Make a folder where you can save all your “home-made” textures in and make sure it’s organized for easier future access.
*For example: I created a ‘Textures’ folder with a ‘Stone’ sub-folder and sub-folders each containing a different kind of stone like ‘Brick’, ‘Brown Tiles’, ‘White Wall’, etc..
*This doesn’t apply to transparent textures tho, I’ll make a tutorial for those later on.
- Save your texture images in their folders (preferably high quality clear pictures for better results).

- Open your texture image in an editing program, turn it greyscale either by converting it to ‘Black and White’ or adjusting the ‘Saturation’ (you may need to adjust the Brightness/Contrast), then ‘Save As’ and give it a new name in the same folder as the original image.
- Using the Bump Image, adjust the Brightness/Contrast, and then save it in the same folder but with a different name (so now you’ll have three different images of the same material).
*Do this step only if you have a texture that has detail you need to pop in 3D in the final render like: carpet, brick, stone, grass, tiles, engraved or embossed surfaces.. etc. or you will end up with a really grainy couch or grooved Laminate Surfaces.

- For Bump & Displacement Maps, you need to keep in mind that Darker areas are Receeded and Lighter areas are Protruding.
- Repeat the process for all the required materials.
- In SketchUp, use random colors or materials and apply them to places you want to add those textures to, then rename each in the Material window to recognize them.
*You can open the material window by going to Window tab>Materials.

- In The Material Window click the ‘Create New Material’ button.

- A window will open. Click the ‘Browse’ icon, navigate to your material and choose the original texture image, then rename it for easier access later.


- You will find that the chosen material has replaced the original one.
*If that doesn’t happen, you navigate to ‘In Model’ materials, delete the old material and the new one will appear.

- Sometimes there are extra materials in your model that come from importing Components or simply a leftover from the 2D human figure that appears when you start Sketchup.
- To Clear them out go to ‘Window’ menu and select ‘Model Info’.

- Find ‘Statistics’ and then click ‘Purge Unused’, wait till it’s done then close the window.
*This also helps when your model gets too heavy or the file gets too large. It simply gets rid of all unused hidden elements that stay in your model even after you delete them.
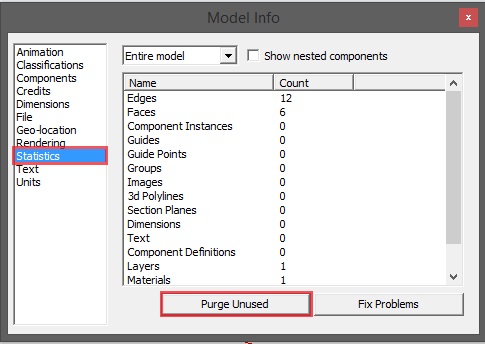
- If you have the ‘In Model’ materials shown, you will see that only the materials actually used in your model are there and nothing else.

- In the Vray toolbar click ‘M’ to open the material editor.

- Find the first material you want to replace in the materials list and click it once (Select/Highlight it). You will see multiple tabs, and no preview available or a distorted material image. We need the ‘Maps’ tab for now. Check the ‘Bump’ box (the ‘Displacement‘ box should be checked only if you made that Negative texture).


- Click on ‘M’ beside the check box to open the window and choose your bump texture.
- When you click it, a window will appear with a Drop Down menu under the Preview.
- Choose ‘TextBitmap’ from the browse button ‘…’ next to ‘File’.
- Pick the black and white image.
*Repeat these steps once again for Displacement, but pick the negative image instead. The preview image might come out distorted after you do that so just uncheck ‘Live Update’ and click ‘Preview’.

- After you’re done you will see that your material changes shape and took on a realistic look in the Preview.

- Repeat the last few steps to all your materials. It’s a long process, I know, but it’s worth it since you get to save that material and use it later!
Here’s how:
- Right click your material in the ‘Material List’.
- Select ‘Save Material’.
- Navigate to your textures folders.
- Save it next to its sister texture images.
And Voila! you have your own Material Library!!
- After you are done, render your image and see the epic result; you will notice in the render below that the stones look more realistic in comparison to the grass and the cement top & base.

If at any point, you face confusion or frustration, worry not! It wasn’t easy for me the first time either. Just come back to this post, take a deep breath and revise the steps. If you set your mind to it, nothing can stand in your way!
Keep in mind that you can comment below with any questions and I’ll get back to you ASAP.
Hey, don’t forget to Subscribe before you leave!
You’ll get weekly doses of inspiration, access to our subscriber’s library full of free helpful eBooks and modeling resources + you can be a member of our little Tribe Community on Facebook; full of awesome designers just like you.


You’re welcome 🙂 Your website is about android? Unfortunately it’s not related to the content I provide here. Unless you have something that can benefit my readers that I have overlooked?
LikeLike
Thank you a bunch for sharing this with all people you actually recognise what you’re talking approximately!
Bookmarked. Kindly additionally consult with my website =).
We can have a hyperlink change contract between us
LikeLike
Thank you
LikeLike
Thank you 🙂
LikeLike
This was an overview of the process, I have posted something more specific for transparent materials, you can find it HERE.
LikeLike
I do consider all the concepts you have presented to your post.
They are very convincing and can certainly work.
Nonetheless, the posts are too brief for starters. May just you
please extend them a bit from subsequent time? Thanks for
the post.
LikeLike
I all the time used to read piece of writing in news papers but now as I am a user of net thus from
now I am using net for content, thanks to web.
LikeLike